Razorpay is one of the most popular payment gateways in India, allowing you to accept payments through UPI, Netbanking, Credit/Debit cards, and wallets. Acadlix provides direct integration with Razorpay so that you can start selling courses easily.
Step 1: Create a Razorpay Account
-
Go to https://razorpay.com and sign up for a Razorpay account.
-
Complete the KYC verification to enable live transactions.
-
After verification, you’ll get access to API Keys.
Step 2: Get Your Razorpay API Keys
Log in to your Razorpay Dashboard.

Navigate to the Payments
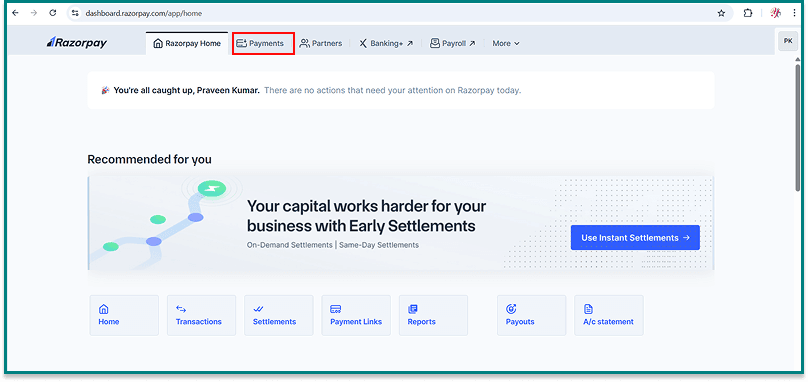
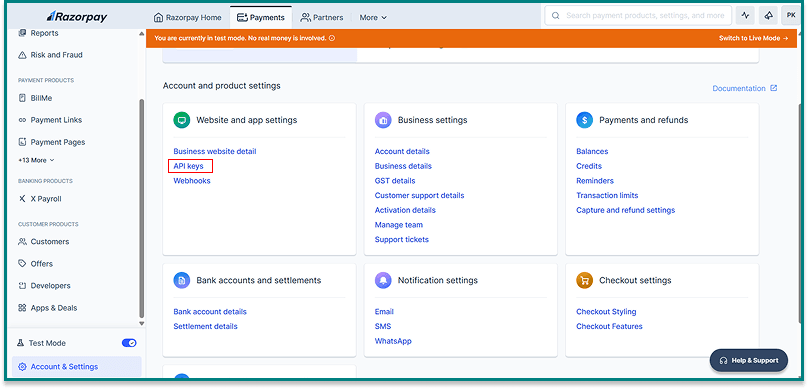
Click on Account & Settings
(Enable the Test Mode to get the sandbox credentials first)

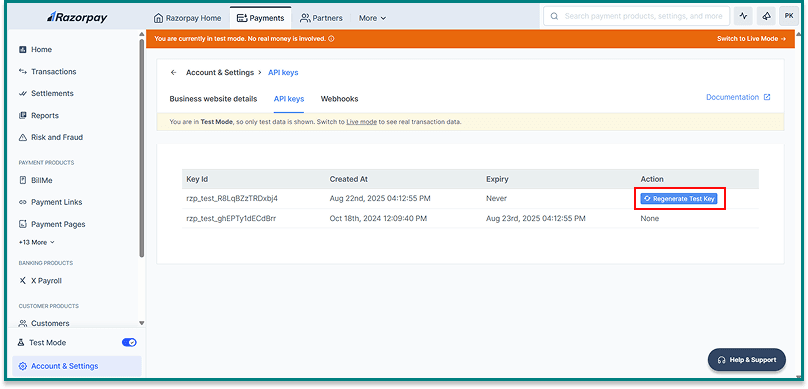
Click on API Keys
Click Generate Test Key

Or if you already see any key in your account, then click Regenerate Test key
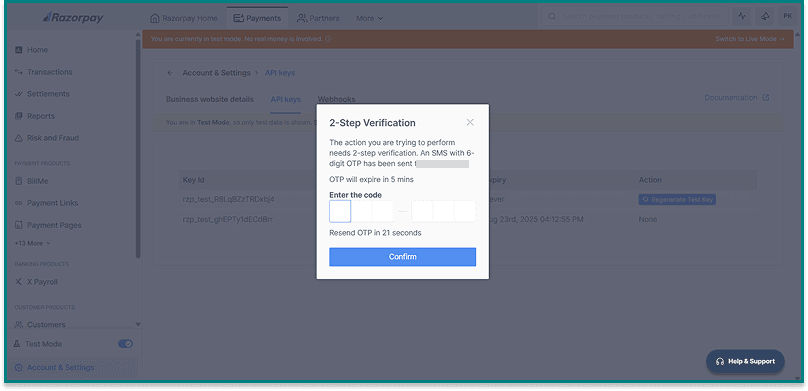
Verify the OTP, if you have enabled the 2-step verification
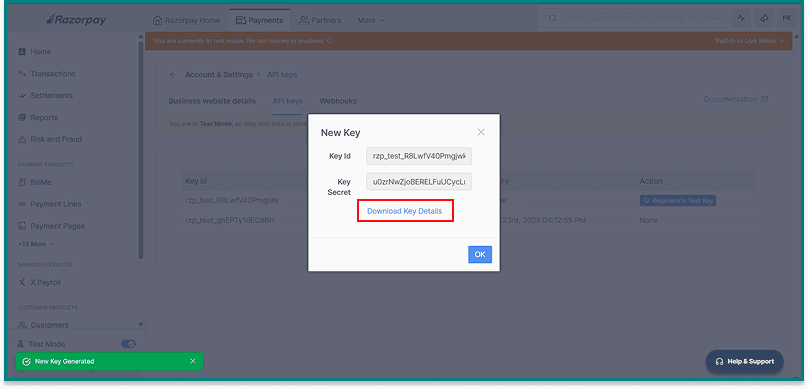
You’ll get two values:
-
-
Key ID
-
Key Secret
-
Copy these keys and keep them safe.
Step 3: Configure RazorPay Webhooks
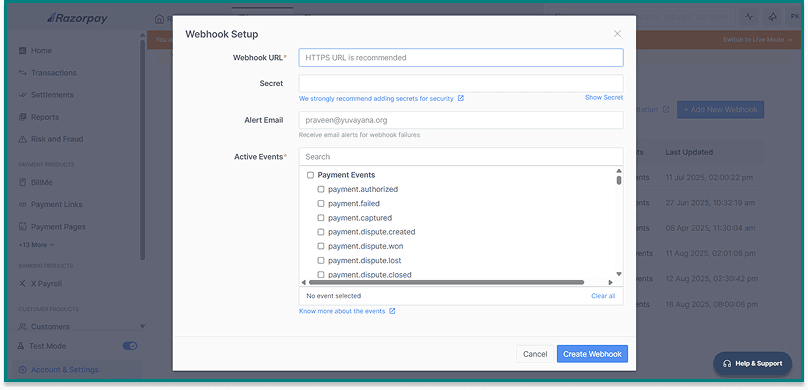
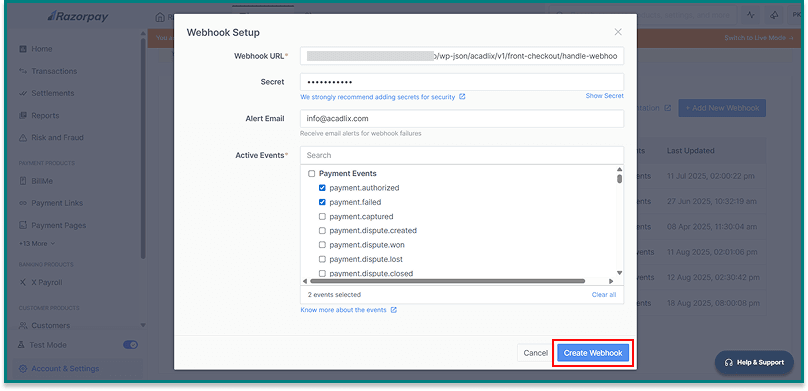
Navigate to the webhooks

Click Add New Webhook

A new Modal will appear to fill the required details
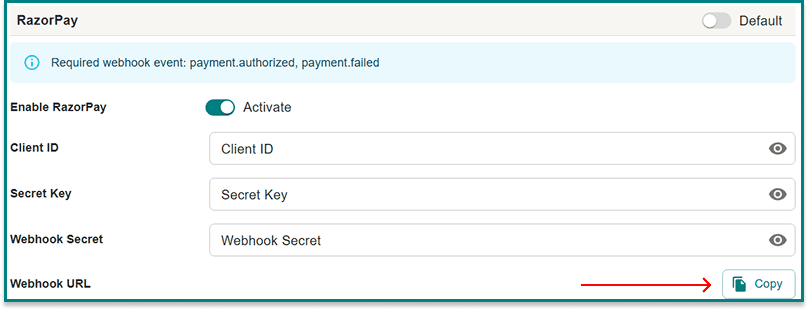
For webhook URL, navigate to your website’s dashboard → Acadlix → Settings → Payment → RazorPay and click the Copy button.
Navigate back to RazorPay and fill in the required details.
- Webhook URL copied from your site
- Type a Secret and keep it safe, as it will be required for the integration.
- Select the Active Events : payment.authorized and payment.failed.
If you are using the subscription module, enable the following additional webhook events: subscription.charged, subscription.authenticated, subscription.activated, subscription.paused, subscription.resumed, subscription.cancelled, subscription.completed, subscription.pending, subscription.halted
Click Create Webhook.
Note: By following the exact same process, you can create your RaorPay live key and salt details.
Step 4: Configure Razorpay in Acadlix
-
Log in to your WordPress Admin Dashboard.
-
Go to Acadlix → Settings → Payments.
-
Select Razorpay from the list of available gateways.
-
Enter the following details:
-
Razorpay Key ID
-
Razorpay Key Secret
-
Razorpay WebHook Secret
-

Click Save.
Step 4: Test Your Integration
-
Make a test purchase of any course using Razorpay test cards/UPI provided in the Razorpay Test Docs.
-
If the payment is successful, you’ll see the order marked as Completed in Acadlix.
-
Disable Sandbox mode when you’re ready to go live.
Step 5: Start Accepting Payments
-
Add the live key, salt, and webhook secret.
-
Students can purchase courses using UPI, Netbanking, Debit/Credit Cards, and Wallets.
-
Orders will automatically be created and marked Completed once Razorpay confirms the payment.
-
Students will get instant course access after successful payment.