Creating a course in Acadlix is simple and intuitive. Follow this step-by-step guide to set up your first course effortlessly.
Step 1: Access the Course Dashboard
- Log in to your WordPress admin panel.
- In the left sidebar, find and click on Acadlix.
- Select Courses from the Acadlix menu.
- Click the Add a New Course button at the top left.

Step 2: Add Course Details
You will now see the course editor. Fill in the following fields:
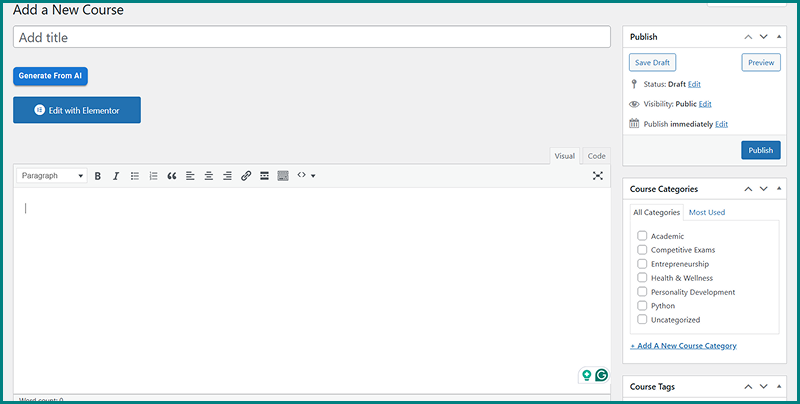
- Course Title: Add the title of your course (e.g., “Introduction to AI”).
- Course Description: Write a brief or detailed description of what the course is about. Use headings, lists, and media to make it engaging.
- Featured Image: Click on Set Featured Image in the right sidebar to upload a course thumbnail.

Step 3: Configure Course Settings
Scroll down to the Course Settings section and you will see the following tab- General, Payment, Instructor, Outcome:
General:
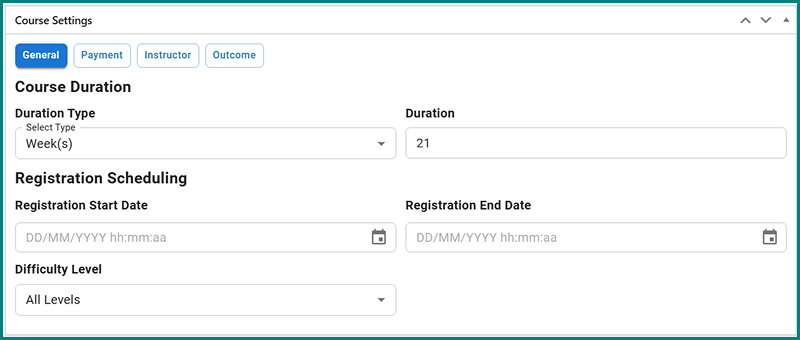
- Course Duration – Select the course duration type from the drop-down and enter the value in the duration option field.
- Registration Scheduling– You can set the registration start date and end date. It will make your course available between the set date, which means students can only register for a course after the set registration start date and up to the registration end date. Make sure that registration end date must be greater to the registration start date. Both of these are optional and you can also set anyone. Just click on the calendar option and select the appropriate date and time and click on “ok”.
- Difficulty level – Select the difficulty level of the course from the available options in the dropdown. It will help your students to know about for which audience it is.
Payment:

- Price: Set a price for the course (leave 0(zero) if it’s free).
- Activate Sale Price: If you want to make the course on sale, then activate the sale price by clicking on the checkbox. It will enable the Sale Price option. Make sure the sale price is lower than the “Price”.
- Tax: Click on the Activate checkbox and set the percentage of tax that you want to collect additionally. It will add the x amount during checkout. For example, if you have set the tax as 10% and the product price as $100, then the final price including tax will be $110
Payment Types:
You will see various payment types that you can select as per your requirement.

- One Time: In this option, the student pays once and receives lifetime access to the course.
- Subscription: Here, students will see the available subscription plans, and their course access will depend on the selected plan.
- Both Subscription & One Time: This provides both options for the course. Students can either make a one-time payment or choose from the available subscription plans.
- Closed: This option allows you to set an external URL and custom button text. It is generally used for affiliate links or directing users to an external payment method.
Instructor:

- By default, the creator of the course is set as the instructor of the course but you can set/change the instructor of the course. You can also setup multiple instructors for the course. Simply click on the select instructor field and select from the available instructors.
Outcome:
- You can add the outcomes of the course. Simply click on the Add button and enter the desired text. To add multiple outcomes, click on the add button again, and to delete any outcome simply click on the red trash can on the front of each outcome.
Step 4: Add Course Categories and Tags
- In the right sidebar, go to Course Categories.
- Click Add New Category or select an existing one.
- Add relevant tags under Course Tags to improve search visibility.

Step 5: Build Course Curriculum
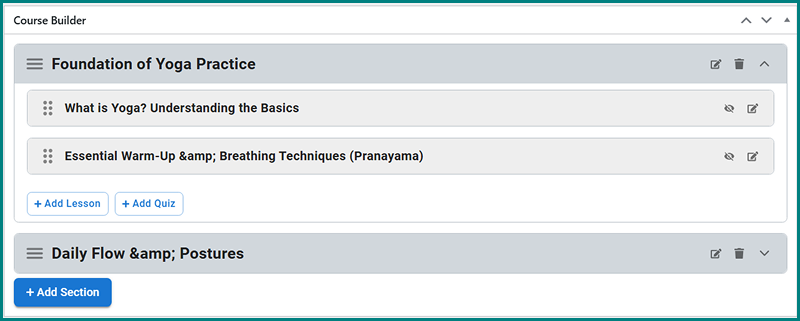
- Navigate to the Course Builder section.
- Click Add Section to create course modules.
- Enter the Section Title and Description and click on the Save Changes button.
- Inside each section, click Add Lesson or Add Quiz to include content.
- Click on Add Lesson or Add Quiz
- Click here to learn how to create a new lesson / create a new quiz or Click on the button Add from existing, to add already added lessons/quizzes.
- Select one of the multiple lessons/quizzes and click on save changes.
- Rearrange lessons or quizzes by dragging and dropping them.
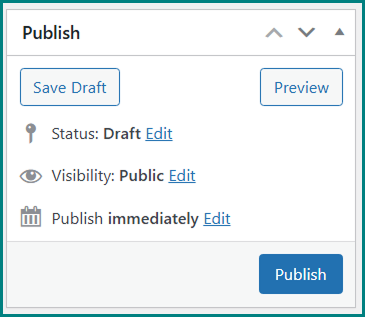
Step 6: Publish Your Course
- Review all the details and settings.
- Click Save Draft to save your progress.
- Once ready, click Publish to make the course live.
Bonus: Preview Your Course
Before publishing, click on Preview Course at the top to see how it looks for students on the front end.
Congratulations! Your course is now live. You can always return to the editor to update content or adjust settings.
Need help with adding lessons or quizzes? Check out our next guide on Creating a New Lesson in Acadlix.