Stripe is one of the most widely used global payment gateways. With Stripe integration in Acadlix, you can accept payments through Credit/Debit Cards, Apple Pay, Google Pay, and many local payment methods.
Step 1: Create a Stripe Account
-
Go to https://stripe.com and sign up for a free account.
-
Complete the business verification (required for live payments).
-
Once verified, you’ll have access to Dashboard → Developers → API Keys.
Step 2: Get Your Stripe API Keys
In the Stripe Dashboard

Go to Developers
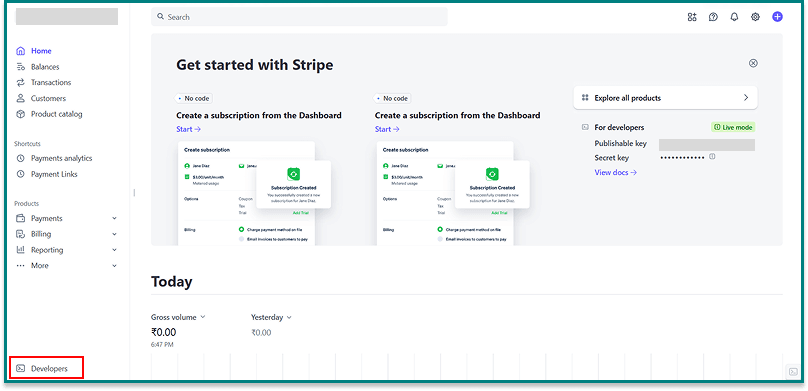
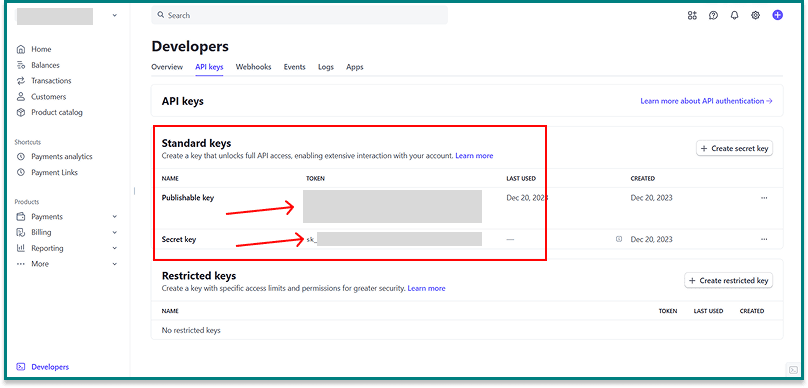
Go to API Keys.

Copy the following values:
Publishable Key
Secret Key
You’ll find two sets of keys:
Test Keys (for testing transactions)
Live Keys (for real payments)
Copy them safely for use in Acadlix.
Now, to create Webhooks, navigate to the Webhooks.
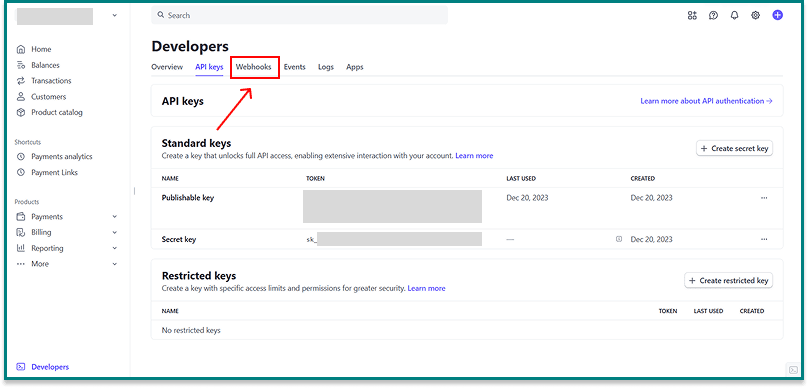
Click Add endpoint

Fill in the Endpoint URL and Details

For Endpoint URL, navigate to your website’s dashboard → Acadlix → Settings → Payment → Stripe and click the Copy button.

Paste the copied Endpoint URL from your site and add a description , and click select events.

Select all the events under “All Checkout events” and click Add events

If you are using the subscription module, enable the following additional webhook events: customer.subscription.deleted, invoice.payment_failed, invoice.payment_succeeded.
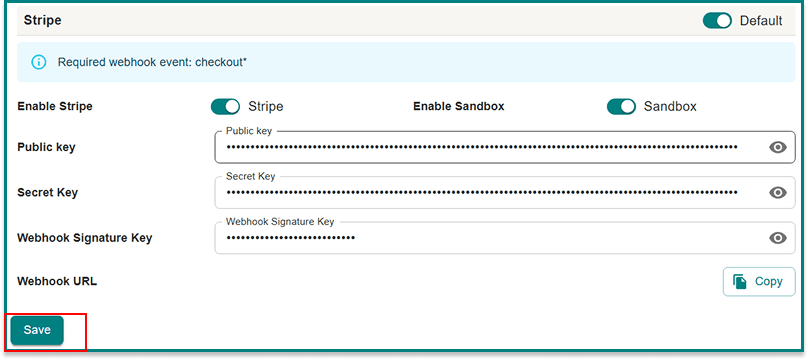
Now, copy the webhook signature key and paste it under your site’s dashboard → Acadlix → Settings → Payment → Stripe

Step 3: Configure Stripe in Acadlix
-
Login to your WordPress Admin Dashboard.
-
Go to Acadlix → Settings → Payments.
-
Select Stripe from the available gateways.
-
Enter the following details:
-
Publishable Key
-
Secret Key
-
(Optional) Enable/Disable Sandbox Mode.
- Webhook Signature key
-
-
Click Save Changes.
Step 4: Test Your Integration
-
Keep Acadlix in Test Mode.
-
Use Stripe’s test cards (e.g.,
4242 4242 4242 4242) for checkout.-
More test card numbers are listed here: Stripe Test Cards.
-
-
Place a test order for any course.
-
If successful, the order will show as Completed in Acadlix, and the student will be enrolled automatically.
-
Once confirmed, switch to Live Mode.
Step 5: Go Live
-
Replace test keys with Live Keys in Acadlix.
-
Disable Test Mode.
-
Students can now pay via Cards, Apple Pay, Google Pay, or local methods supported by Stripe.
-
Orders will be created and marked Completed automatically after payment confirmation.