Login Options
Acadlix provides a dedicated shortcode that allows you to create a custom Login/Signup page anywhere on your website. You can place this shortcode on any WordPress page, and it will display the default Login/Register interface dynamically.
Default Screen Setting
You can choose which screen the user will see first — Login or Register.
This option helps you decide the default user flow. For example:
-
If you mostly expect existing users → set Login as default
-
If you expect new visitors to join first → set Register as default
Registration Options
Control the registration form by enabling or disabling the mobile number field. When enabled, a mobile number field with a country code will be displayed on the registration page. You can also mark this field as required.
The mobile number field is required if you plan to use SMS-based login or multi-factor authentication (MFA).
Fraud Protection
Enabling this option allows you to set up Google reCAPTCHA v3 for your login and registration forms. This will automatically help you fight spam registrations and bot logins.
If you are experiencing spam registration on your website that uses the Acadlix login form, then you can easily solve this issue using the Google reCAPTCHA integration module.
MFA Options
Multi-factor authentication (MFA) adds an extra layer of security to student login by requiring additional verification along with the password. This helps ensure that access is granted only to the correct student, even if login credentials are shared or compromised.
From this section, you can configure how MFA and OTP verification behave across your site.
OTP expiry time (in seconds): Set how long a generated OTP (One-Time Password) should remain valid. Once this time expires, the OTP can no longer be used, and the student will need to request a new one.
Resend OTP Interval (in seconds): Define the minimum waiting time before the Resend OTP button becomes available again. This helps prevent repeated OTP requests and reduces unnecessary load on your SMS or email gateway.
OTP Resend Limit: Set the maximum number of times a student is allowed to request an OTP resend. This acts as a safeguard against misuse and helps control OTP traffic.
Note: MFA OTPs are sent via email. Before enabling this option, make sure your site is properly configured to send emails.
OTP Based Login Options
OTP based login allows your users to log in without a password using a time-based password or Code via email or sms. Here, you can configure the different settings to customize it as per your requirements.
OTP Based Login Method
You can select which method you want to send the OTP. We have provided an option for either email or sms or both. You can choose anyone at your ease.
OTP Based Login Expiry Time (in seconds)
You can set a time in seconds. Once this passes, the generated OTP will expire, and the user will not be able to log in with that. Generally, sites use 10 minutes or 600 seconds, but you can set it to any number at your ease.
Resend OTP Based Login Interval (in seconds)
The resend OTP button will get active after this set interval. This also helps to avoid the abuse of the email or sms API from bots or users. So set a value accordingly.
OTP Resend Limit
This option lets you set a limit to retry or resend the OTP for a session. By default, it is set to 3, but you can make it higher or lower as per the need.
Phone Code User Meta Key and Phone User Meta Key
If you have any existing plugin with that, you are collecting the phone numbers of your students, then you can enter these values provided by that plugin. With this, Acadlix will send sms based OTP to the old users also.
Let it be as it is, if you don’t use any plugin to collect the phone numbers.
Select SMS Gateway
SMS Gateways allow you to send OTP with their API. We have the following sms gateways integrated with Acadlix, and you can choose your preferred one. Make sure that you have properly completed the integration.
How to Create Google reCAPTCHA v3 Keys?
Goto https://developers.google.com/recaptcha/
Click on the Get Started button
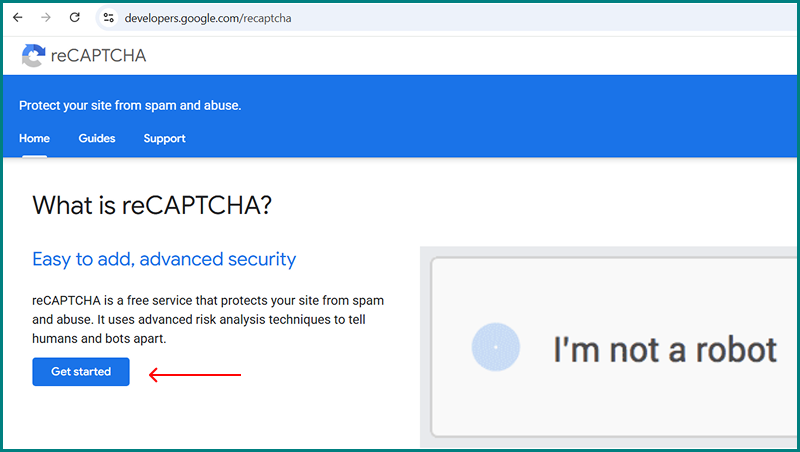
Again, click on the Get Started button

Now you are on the Google reCAPTCHA page.
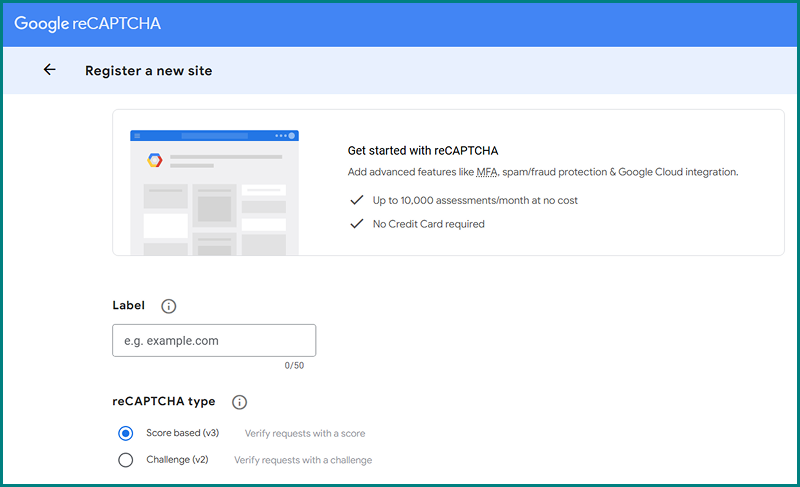
Enter the required details like
- Label – Set any name like Acadlix LMS
- Choose the “Score Based v3”
- Enter the domain name
- Set a Project Name

Accept the Terms and Conditions by clicking on the checkbox
Click on the Submit Button.

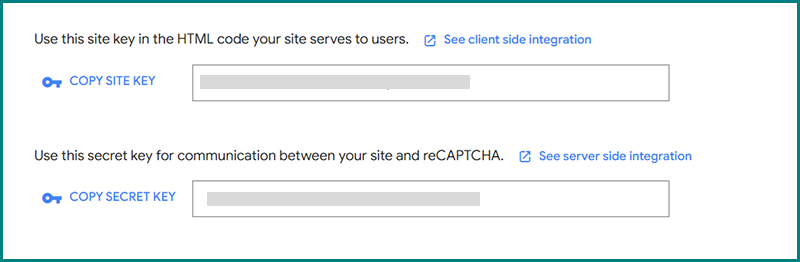
Congratulations! Your Site key and secret have been created.
Keep them handy to set in the Acadlix.
How to configure Google reCAPTCHA in Acadlix LMS?
Navigate to the Acadlix Settings
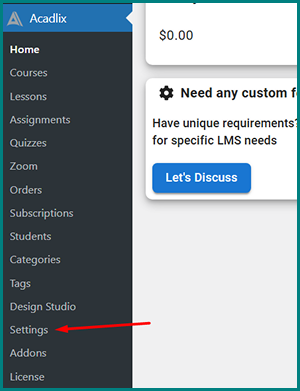
Navigate to the Authentication
Paste the Site Key and Secret key from the Google reCAPTCHA website.
Click the “save” button.

Now! Google reCAPTCHA is integrated into your LMS.