
PWA addon lets your students download your app directly from the student dashboard. Once you enable the Acadlix LMS PWA addon, your website will turn into a Progressive Web App. When you configure the student dashboard mobile options, it will look like an Android or iOS app.
How to enable the PWA Addon?
Navigate to the Addon manager by clicking on the “Addons” option from the left Acadlix menu.
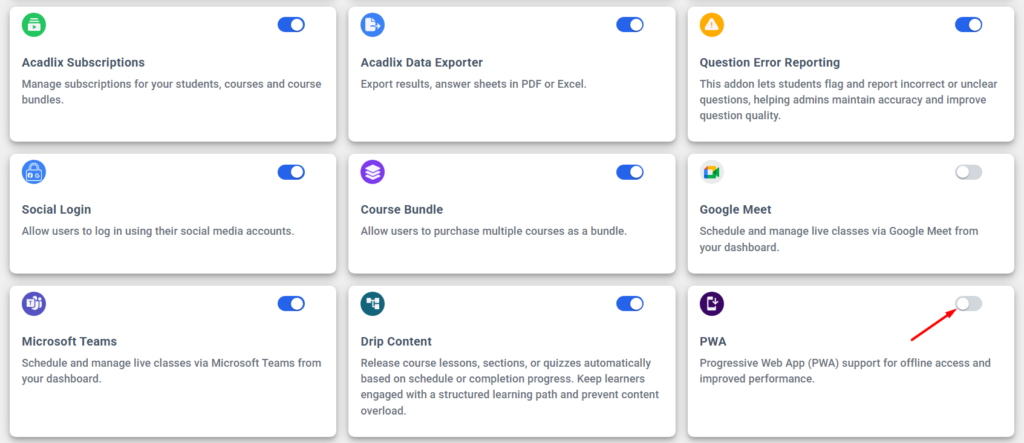
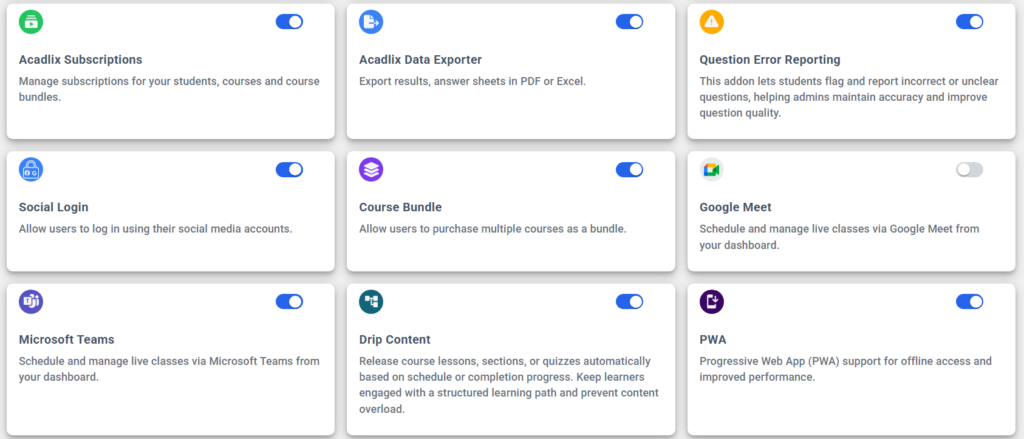
Enable the toggle button in front of the “PWA” add-on
How to configure the PWA in Acadlix LMS?
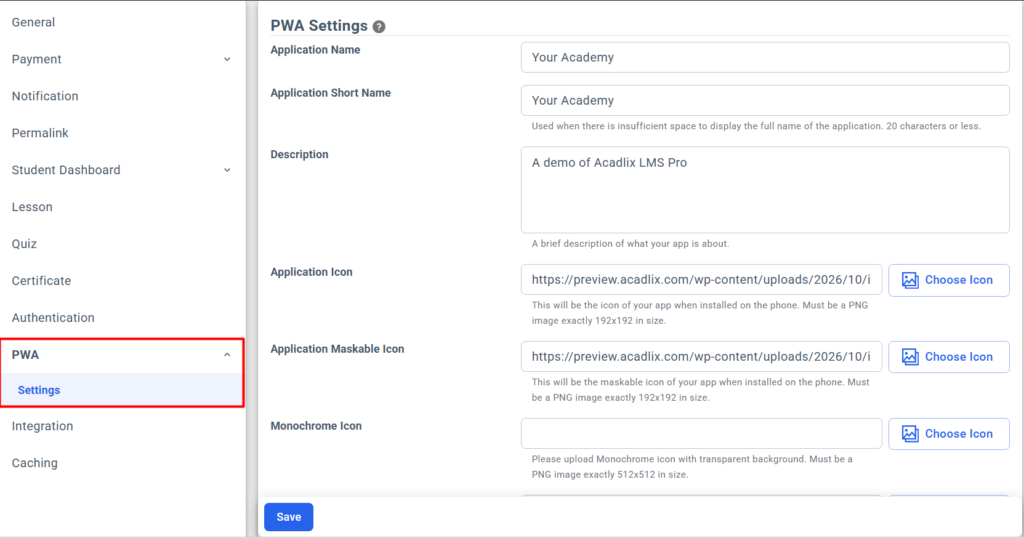
Once you enable this add-on, the PWA settings will be available under Acadlix -> Settings -> PWA
Let’s start one by one
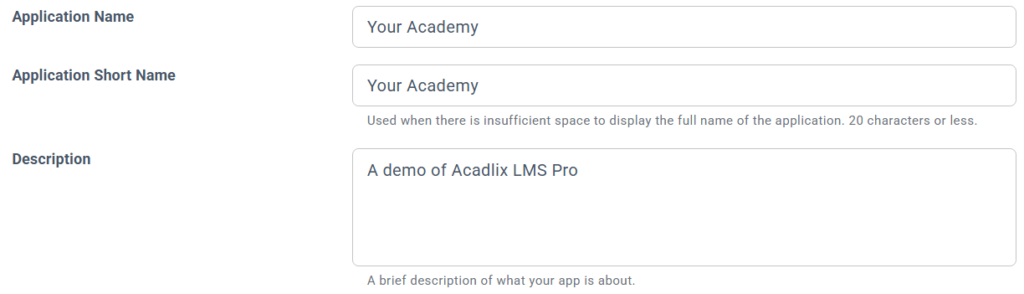
Application Name: Enter a name that you want to set for your App, so that learners can recognize your app on their device. It can be your company name or website title. This will be visible to the learner on their device. For example: Yuvayana Student Learning App.
Application Short Name: Enter a short name for your app; it will be displayed when there is not enough space available to display the long application name. For example: Yuvayana.
Description: Add a brief description about your App.
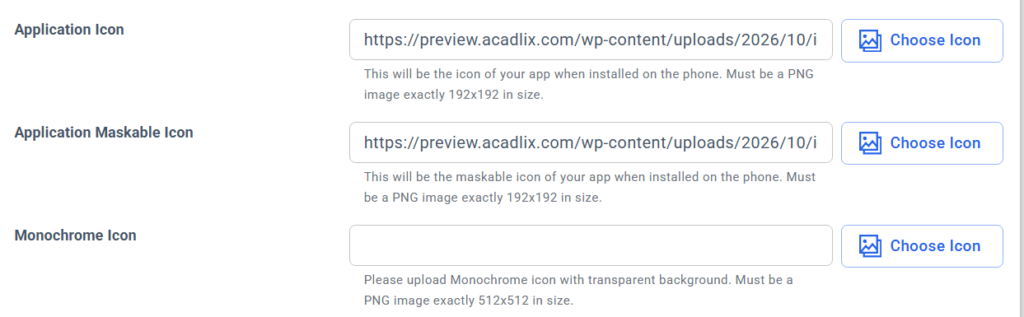
Application icon: Add a square icon for your app. This icon will be visible on the devices where it will be installed. The preferred size for this icon is 192×192 px, and the format must be PNG.
Application maskable icon: An Application Maskable Icon in a PWA (Progressive Web App) is a specially designed app icon that allows Android and other supported devices to display your app icon properly across different shapes, such as circles, rounded squares, and squircle shapes. So make sure you have enough space or room from the main icon part. Without a maskable icon, the icon may get cropped or have unwanted white space.
Monochrome Icon: A Monochrome Icon in a PWA is a single-colour version of your application icon. It is primarily used by Android to display your app in themed interface elements, such as Themed App Icons and certain launcher or system UI areas. It must be a PNG image exactly 512×512 in size.
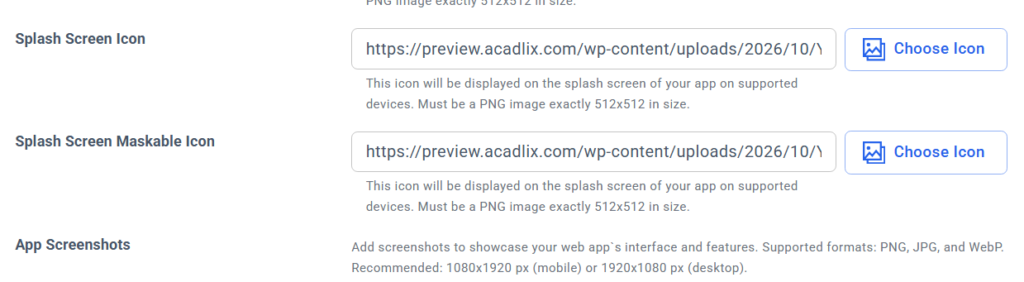
Splash Screen Icon: Upload an icon to be displayed on the splash screen when users launch your PWA. This icon appears temporarily while the application loads and helps maintain your brand identity during startup. Use a high-quality, square PNG image for the best results.
Splash Screen Maskable Icon: Upload a maskable icon for your PWA splash screen to ensure it displays correctly across different screen shapes and device sizes. The icon uses a safe area to prevent important elements from being cropped while maintaining a consistent appearance during application startup.
App Screenshots: Upload screenshots of your PWA application to showcase its interface, features, and user experience. These screenshots may be displayed in supported app installation interfaces, helping users preview the application before installing it. Use high-quality images that clearly highlight your app’s key features.
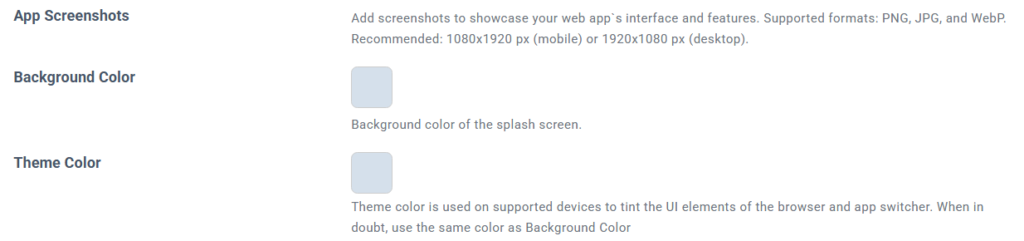
Background Color: Set the background color for your PWA splash screen, which appears when users launch the application while it is loading. Choose a color that complements your application icon and branding to provide a consistent visual experience.
Theme Color: Theme color is used on supported devices to tint the UI elements of the browser and app switcher. When in doubt, use the same color as Background Color.
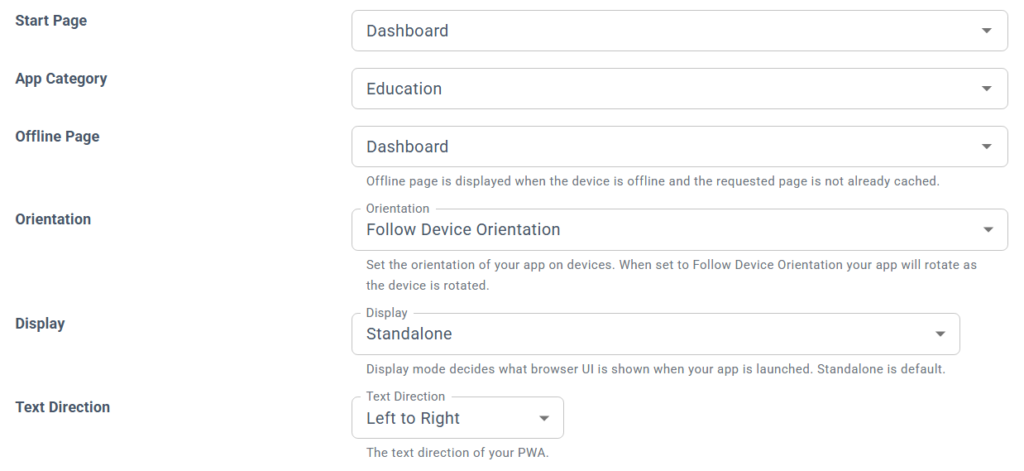
Start Page: Set the start page that you want to display to the learner when they open your app. Generally, we recommend setting the Acadlix Student Dashboard Page as start page.
App Category: Here, choose the category for your app. As Acadlix is an LMS plugin, so we recommend using the “Education” as category but you can set any one from the available options.
Offline Page: Set a page that you want to display when the learner is offline and there is no internet connectivity.
Orientation: You can set the app orientation from the available options of Portrait, Landscape, or Follow device orientation. We recommend setting “Follow device orientation” so that it will work fine across all types of Acadlix courses.
Display: Configure how your PWA is displayed when users launch it. This setting determines whether the application opens in a standalone app-like experience without the browser address bar and navigation controls, or retains the standard browser interface.
- Fullscreen: Displays the PWA in full-screen mode, hiding browser controls and system UI elements where supported.
- Standalone: Opens the PWA like a native app, hiding the browser address bar and navigation controls.
- Minimal UI: Opens the PWA with limited browser controls, such as a navigation or refresh button, where supported.
- Browser: Opens the PWA in a regular browser tab with the standard browser interface.
We recommend setting the app to “Standalone” mode.
Text Direction: Configure the text direction of your PWA interface based on the language being used. Choose Left to Right (LTR) for languages like English, Hindi, and Right to Left (RTL) for languages like Arabic, Urdu, and Persian to ensure proper text alignment and layout.
Advance Settings
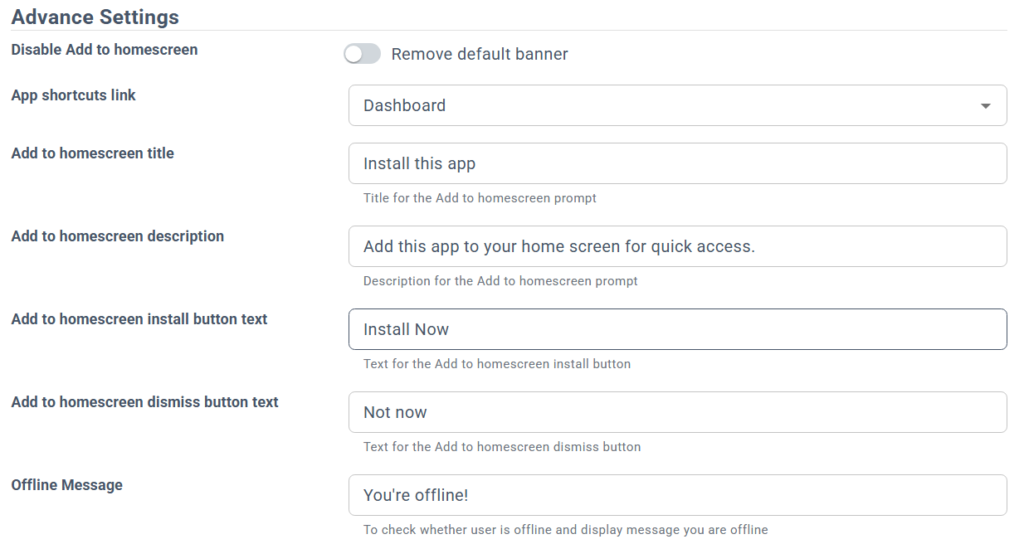
Disable Add to Home Screen: Enable this option to disable the Add to Home Screen prompt for your PWA, preventing users from installing the application through the browser’s home screen installation option.
App shortcuts link: Add shortcuts to specific pages or features of your PWA, allowing users to quickly access frequently used sections directly from the app icon’s context menu. For example, you can add shortcuts to Dashboard, My Courses, or My Quizzes.
Add to Home Screen title: Set the title displayed in the Add to Home Screen prompt when users install your PWA. Choose a short, recognizable text that helps users to know that this app can be installed.
Add to Home Screen description: Set a short description that appears in the Add to Home Screen installation prompt, providing users with a brief overview of your PWA and its purpose. Use this description to highlight the application’s main functionality and help users understand what they can access after installation.
Add to Home Screen install button text: Set the text for the installation button displayed in your PWA’s Add to Home Screen prompt. Choose a clear, action-oriented label such as “Install App“, “Add to Home Screen“, or “Get Started” to encourage users to install your application.
Add to Home Screen dismiss button text: Set the text for the dismiss button displayed in your PWA’s Add to Home Screen prompt. This button allows users to close or skip the installation prompt without installing the application. Use a clear label such as “Not Now“, “Maybe Later“, or “Dismiss“.
Offline Message: Set the message displayed to users when they try to access your PWA without an internet connection. This message informs users that the application is currently offline and may not be able to load certain content or features. For example: “You are currently offline.”
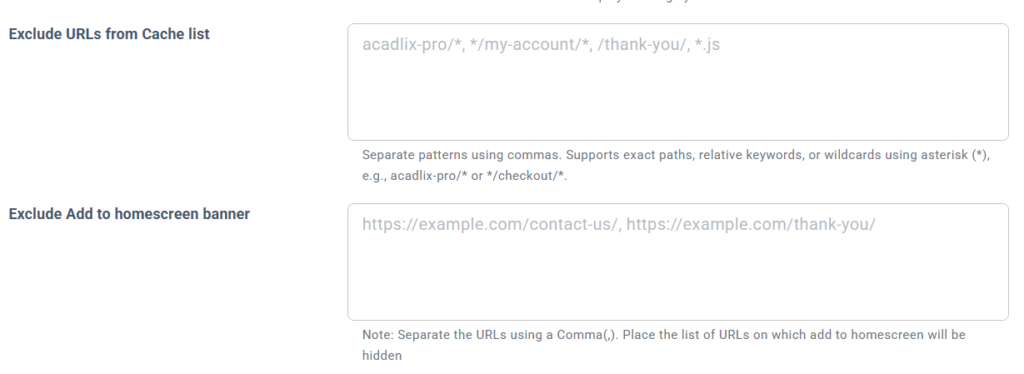
Exclude URLs from Cache list: Specify the URLs or page paths that should be excluded from PWA caching. Pages matching these URLs will not be stored in the cache, ensuring that dynamic or sensitive content, such as checkout pages, payment pages, and user account pages, is always loaded from the server.
Exclude Add to Home Screen banner: Enable this option to hide the Add to Home Screen installation banner on specific pages of your website. This is useful when you want to prevent installation prompts from appearing on pages such as checkout, payment, login, or other important pages.
Status
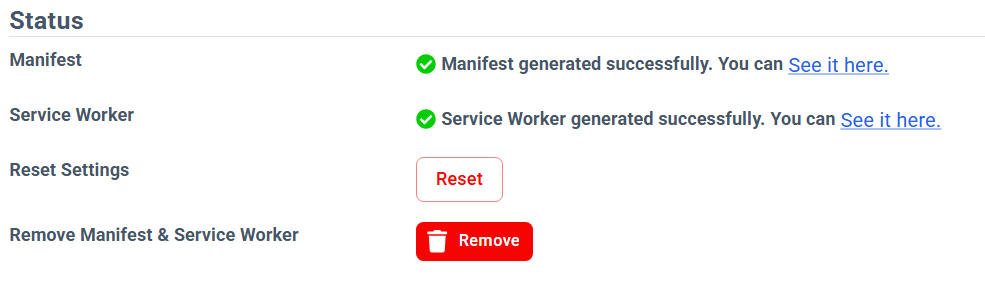
Manifest: View the status of your PWA manifest file to verify that the application configuration and installation settings are properly generated and accessible.
Service Worker: Check the registration and status of the PWA service worker, which manages caching, offline functionality, and background operations.
Reset Settings: Restore all PWA settings to their default values. Use this option to start the PWA configuration again from scratch.
Remove Manifest & Service Worker: Remove the generated PWA manifest and unregister the service worker from your website, disabling the PWA functionality.